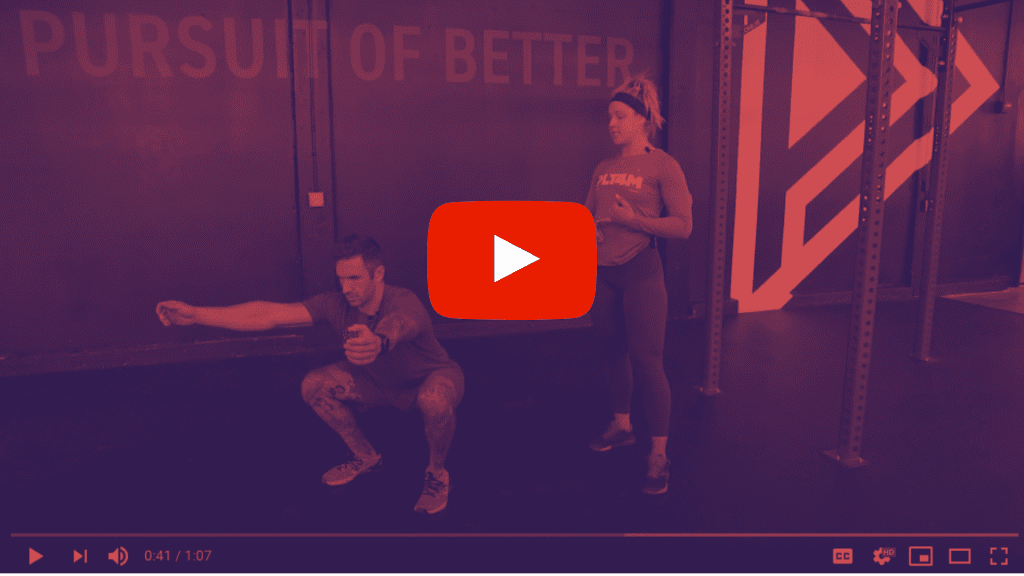
The air squat is arguably one of the most important foundational movements here at PLT4M. Check out how we teach proper air squat form.
What is an air squat?
The squat is one of the foundational human movements patterns we look to teach to all students. People love the squat because it has so many different variations like:
- Air Squat
- Goblet Squat (Medball or Dumbbell)
- Barbell Back Squat
- Barbell Front Squat
- Overhead Squat
The air squat, simply put, refers to the bodyweight version of the squat pattern. Whether you call it a squat, an air squat, or something different, there are a whole host of benefits.
Foundational Human Movements Posters
Help your students master the 5 foundational human movements with these ready to print posters.
Benefits of the air squat
Mastering proper air squat form boasts the most bang for your buck.
Firstly, it is a movement pattern essential to our DNA. Squatting (properly) is how we were designed to sit – chairs, couches, and toilets haven’t always existed. Squatting and standing is our way of getting up and down.
Secondly, it is a movement that can be used to improve your performance in every way. Proper squat mechanics translate into enhanced body control in a multitude of movements, keeping you injury-free and energy efficient.
Developing raw squat strength makes you more powerful and explosive and initiates one of the best hormonal responses you can get from working out. Working the squat and its variations is also one of the best full-body mobility tools there is. Not surprisingly, it is also one of the most versatile movements you can program – from strength, to power, to stamina, to pure mobility, you can get it all from the foundation of proper air squat form.
While some may claim (still?!?!) that a full range of motion squat is injurious to one’s knees, the truth is actually just the opposite. Instilling proper mechanics and adding the squat through training is actually quite rehabilitative of bad knees (and backs, hips, etc).
Ready to Learn More?
Schedule a free 10 minute consultation to see how the PLT4M system can help save you time, and empower student learning!
Proper Air Squat Form
All of these benefits, though, assume a mastery of movement. You’ll never see results if you don’t set the foundation first. So let’s talk about a proper squat and it’s 4 Points of Performance.
The 4 points of performance of proper air squat form include:
- The Stance
- Lumbar Curve Maintained
- Knees Tacking Toes
- Hips Descending Below Parallel
With any type of squat, we want to be sure we have these 4 points of performance for proper air squat form in mind. Let’s take a closer look at each of these points of performance.
1. Entire foot in contact with the ground
The Stance – there is a reason it exists as our first and foremost point of performance when engaging in any type of squat, loaded or otherwise.
Often, students have failed the movement before they’ve even begun. Feet are too narrow or too wide, weight is in the toes, or any combination of issues. To ensure the success of the squat, and the maintenance of all 3 of our other points of performance, we must set ourselves up for success, starting at the ground.
First, where do we put our feet?
In fact, true stance width will vary slightly throughout a population of students. Depending on height, anatomy, mobility, and a number of other considerations (we’re all different!), students will eventually find the “right” stance for them through reps and experimentation. When instructing new students though, we like to give them a place to start.
For this reason, we tell students that we are looking for a “slightly wider than hip”, or shoulder-width, stance. We do not want the feet directly under our hips as we do in the deadlift, for example. Rather, we want a slightly wider base.
Additionally, we recommend students turn their toes out just a bit – like “11 & 1” on a clock face. This small external rotation of the hip pre-squat helps set our body pattern for the most safe and efficient movement pattern. It also provides “room” for the hips and core to descend as the knees drive out over the toes.
Lastly, we want to balance our weight through the entirety of our foot. While keeping your “weight through your heels” is a useful cue for students that are coming up into their toes, it’s not EXACTLY what we are looking for.
Perfect movement sees the student’s foot in complete contact with the ground throughout the entire rep. Think about standing on a large piece of paper, and then trying to rip it in half with your feet as you perform the rep.
This is the type of full-foot engagement we are looking for.
2. Lumbar curve maintained
Another of the 4 Points of Performance for great squatting, maintaining the lumbar curve is a big one.
You’ll often hear coaches shouting for proud chests or vertical torsos when working with the squat. While these can be useful cues, what we really care about is spinal alignment. The goal, essentially, is to maintain a neutral spine throughout each rep of your squat. To achieve this goal, we focus specifically on the lumbar curve.
But first, what is the “Lumbar Curve”?
The term “lumbar” refers to the section of spine that sits between your thoracic spine (think rib cage) and sacral spine (think tailbone). It is made up of 5 vertebrae and the disks between them (L1-L5). If you stand tall, you’ll notice that the spine is not completely straight, it is actually gently curved like an “S”. The lumbar section of your spine makes up the bottom curve of the “S” shape. This means you’ll see a small “scoop” in the lower back as compared to the hips and upper back. This is what we refer to as the “Lumbar Curve”.
Our goal, while squatting, is to retain this neutral “S” curvature. Though, there is a slight range of flexion and extension allowed, so it’s easier to focus on what we do not want to see.
What we want to avoid is that bottom of the “S” (looking at the back from this profile view) turning into a “C”. The moment the gentle arch of our lower spine turns into a rounded hump in the opposite direction, we are putting undo stress on a fragile part of our body. A flat lower back is good – a rounded one is not.
While we can likely get away with bodyweight reps using a compromised Lumbar Curve, the moment we add weight to the equation, we risk injury.
So, we should always hold every rep accountable, no matter the situation.
Foundational Human Movements Posters
Help your students master the 5 foundational human movements with these ready to print posters.
3. Knees tracking toes
One of the most common issues we see with young or inexperienced students is an inability to track the knees over the toes during the entire range of motion of a full squat.
Frequently, we see students experience “Valgus Knee Collapse” or the knees caving in on either the way up or down.
More than just being inefficient, this position is a dangerous one, especially if it becomes a habit. The knee joint is intended to operate as a simple hinge, and it can only do so if it is stacked directly over the ankle. Anything else puts undue stress on the connective tissue holding the joint together. While students can often get away with it, even under load, it allows for the development of a very serious muscular imbalance about the knee joint that can cause injury outside of the weight room.
What we want is to actively engage the glutes and establish a strong external rotation of the hip. The femur (big thigh bone), should always be pointing in the same direction as the toes. Never outside, never inside – keep that knee joint stacked in line with the ankle.
Getting the knees to track the toes teaches the student to properly engage the hips and glutes, reinforcing the knee joint by eliminating a structural imbalance, helping to prevent non-contact ACL injuries and the like. It also puts the student in the most stable and most powerful position. This allows them to safely move more weight, and see better results.
Long story short: we want to get our students tracking their knees over their toes on every rep.
4. Hips descending below parallel (hip joint below the knee joint).
Our very LAST point of emphasis should be the depth of our squat.
Our ultimate goal is full-depth, aka traveling low enough such that our hip crease descends below parallel. We can see this point of performance by envisioning the placement of a marble on our knee. If it were to roll back into the hip crease, we know we have achieved full depth.
BUT, we DO NOT CARE ABOUT DEPTH if it comes at the expense of any other point of performance.
We should always strive to hit our first 3 points of performance on any given squat, rather than sacrifice movement for depth.
Key Takeaways On Proper Air Squat Form
The squat is arguably the most important foundational movement here at PLT4M. It is truly a staple of our fitness workouts and middle and high school physical education lesson plans.
The basis of fitness, performance and a healthy life, squatting is something everyone should master. We spend a lot of time introducing the movement and cementing proper mechanics before adding intensity or variation to the equation.
Each and every time you dive into squatting, make sure proper air squat form is at the forefront of your mind.
Get intimate with the details.
The ability to dial in great technique day in and day out makes a world of difference. From here, you can start to introduce different variations like the barbell back squat and other more complex movements.
FAQ
What age should students start air squatting?
Air squats are great for all ages! When it comes to start loading squats, aka adding weight, there should be more careful consideration around age and development.
Does PLT4M teach other types of fitness besides foundational human movements?
Yes, while we love talking about things like proper squat form, it is only a small part of our more comprehensive curriculum and content. Better yet, mastering the foundational human movements directly improves students ability to try out things like yoga, dance, pilates, weightlifting, and many of PLT4M’s other content offerings!


