This article explores yoga lesson plans for high school and provides a free resource pack for PE teachers! Check out the power of yoga in physical education below.
Struggling to find yoga lesson plans for high school students?
Students want to learn yoga! They are excited by the idea of taking a yoga class on their own, and physical education can be the first stepping stone for students to learn yoga.
But finding yoga lesson plans for high school students is hard! Most yoga for kids and beginners is geared towards elementary students. And yoga for a more advanced group can be very complicated with all sorts of challenging yoga poses like handstands and crazy twists.
Often teachers are left trying to make up lesson plans on their own!
Producing multiple physical education yoga lesson plans is time-consuming!
Not only is creating yoga lesson plans time-consuming, but chances are also, you are not a yoga teacher by trade! You might have taken a class or two yourself, but your yoga expertise doesn’t reach far past knowing the difference between a warrior pose, mountain pose, and tree pose.
But you don’t want to avoid yoga altogether because you know how much your students want to do it! Not to mention, there are countless benefits of yoga for students.
So, where do you go to add yoga to your physical education program?
A 3-Unit Approach to yoga lesson plans for teachers
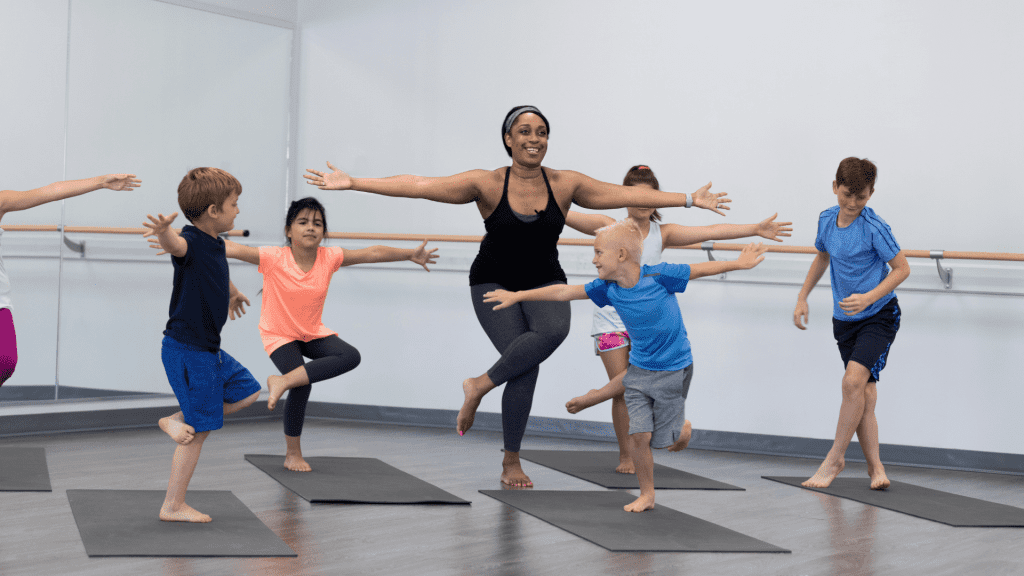
There is more than enough yoga content that you could stretch out over a few weeks, a few months, or even an entire year. But, no matter how you choose to space out the lessons, there is a 3 part approach that will leave any student ready to walk into a yoga studio.
- Part 1: Introduce basic yoga poses & postures
- Part 2: Practice slow and basic yoga sequences with a new addition of breathing techniques
- Part 3: Develop more advanced yoga flows that introduce new movements throughout the workout
Here’s what yoga for high school students looks like for the year
Unit 1: Intro to Yoga Poses
Before feeling like you have to dive right into complicated yoga flows, consider covering the basics. By finding each pose individually, students can know what good technique and form should feel like. There are six major buckets of movements you want to be sure to cover in an intro to yoga:
- Standing
- Twisting
- Balancing
- Hips
- Spine
- Core
Example Lesson:
Each yoga session begins with a guided warm-up, step-by-step movement and pose education, scaling modifications, and detailed technique work. Then, students finish each lesson with guided flows that reinforce the major education points of the day.
In this example lesson, students are introduced to 4 of the most basic standing poses before working them into a basic yoga sequence.
Welcome back to your second session of PLT4M yoga. In our first session, we spent the entire lesson focusing on the Sun A warm up. We practiced it a few times last session, and now today, we will kick things off with that full flow!
From there, we are going to be introducing FOUR new standing poses: Chair, Warrior 2, Extended Side Angle, and Reverse Warrior. You will notice that three of these poses (Warrior 2, Extended Side Angle, and Reverse Warrior) all have the same stance! We have deliberately programmed these poses together so you can get comfortable and familiar with this stance throughout today’s lesson.
After we introduce the movements, we will go through an awesome flow that combines our new movements and some of the things we learned from lesson one. Pay close attention to the modifications Lulu suggests throughout the lesson because the flow will be challenging! We encourage you to modify and start small. As you get more comfortable with your yoga journey, you can always push yourself to make things a bit more challenging as we progress.
The Chair Pose is very common in yoga! Chair Pose activates some of the largest muscles in your body and gets your heart pumping!
To find Chair Pose, start with a slight bend in your knees and be sure they are ‘stacked’ directly over your ankles. Press your tailbone down toward your mat and use your core to lift your chest. From here, you can either keep your hands at your chest or, for a more challenging variation, lift them over your head.
A common fault in the Chair Pose, especially when students raise their arms overhead, is excessively rounded backs. Squeeze your shoulder blades together to lift your chest and find a strong back position.
3 Points of Performance:
-Bend your knees, shift weight into your heels
-Press your tailbone down and use your core to lift your chest
-Draw your shoulder blades down your back, keeping your hands at your chest or above your head
In this video, we will 1) Introduce Warrior 2 stance 2) Practice Warrior 2 on Right and Left Side
The next three poses we will introduce have the same leg stance and offer different arm variations.
To find this stance:
1. Separate your feet and point your front foot forward and back foot out to the side.
2. From here, check to see that your front heel is bisecting your back foot arch.
3. Place a 90 degree bend in your front knee and make sure to keep your knee stacked over your ankle.
4. Press your tailbone down to keep your shoulders stacked over your hips.
This is your stance! Start with your feet closer together, and as you feel more comfortable in this stance, you can widen your feet out on your mat to increase the difficulty. Our primary goal is to keep the 90-degree angle in our front leg, so only widen your stance as far as you can continue this performance point.
To complete the Warrior 2 pose, T out your arms and squeeze your shoulder blades together to create length through your fingertips. Option to keep your gaze straight ahead, or maybe bring it over your front fingertips.
3 Points of performance:
-(Front) heel to (Back) arch alignment
-90 degree bend in your knee and stack it over your ankle
-Reach your arms in opposite directions, and squeeze your shoulder blades together
In this video, we will 1) Introduce Extended Side Angle On Right and Left Side
We will continue to build on our new stance, but now change up the arm positioning slightly! This is a slightly more challenging position, so don’t hesitate to bring your feet a little closer together to start! Make sure you keep that 90-degree angle in your front leg!
From the same stance, T your arms into Warrior 2. Stretch and lean your upper body towards your front foot, and begin to hinge at your hips. Once hinged over, sweep your arms to ‘6 and 12’ of your ‘body clock.’ Place your bottom arm on your thigh to keep yourself stable. Our goal is to have our shoulders stacked. As we get more experience, we could extend our bottom arm out as well, but for now, most of us should stick with our bottom arm on the thigh.
A common fault of the Extended Side Angle pose is excessively leaning too far forward or backward. If we feel a little shaky and not stacked, bring your feet closer together to allow for a bit more of a stable base position.
3 points of performance:
-90 degree bend in front knee
-Hinge forward at your hip and reach your hands to 6 & 12
-Press your bicep into your thigh to help open your chest (stacking your shoulders)
In this video, we will 1) Introduce Reverse Warrior On Right and Left Side
For our final new pose of today’s lesson, we are sticking with the exact same stance.
To get to our reverse warrior, we will go back to the standard warrior (arms T’d out to the side). From here take your front arm and reach it up and overhead. Let your back arm softly rest on your thigh (or option to fold it behind your back).
Lengthen your arm overhead and reach your fingertips back to open up. Feel your obliques and side stretching out! Our goal is to stay stacked here, and not excessively lean forward or backward. Think about keeping everything in your upper body in a straight line.
3 points of performance:
-90 degree bend in front knee
-Reach your top fingertips up to lengthen your side body, and then back to open
-Little to no weight in your back hand
Unit 2: Breath To Movement Flows
Students have not had to focus on their breathing up to this point. In unit 2, however, students will incorporate different breathing exercises that will add to their overall yoga practice. The goal of unit 2 is to connect the different poses more fluidly and work to deepen the vinyasa style of yoga they are practicing. In doing so, they will:
- Build confidence in their yoga practice
- Develop stamina and capacity to complete longer yoga workouts
- Strengthen muscle groups by adding in new and more complicated poses
Example Lesson:
Each yoga session begins with a guided warm-up and an opportunity for students to check in mentally and physically to the day’s lesson. Each lesson will follow a traditional yoga flow and move throughout an entire 30-minute workout. Lessons will also introduce 2-3 movement/pose variations embedded directly within the longer flows.
Welcome back to another lesson of yoga flow! By now, you know what this is all about! We are going to flow for basically a full 30-minute workout, so get ready to go!
Our new poses we will slip into our lesson are Cat/Cow, Open Simple Twist, and Crescent Moon.
Often found at the beginning of classes, this pose is meant to help warm up our spine. From tabletop, we rotate between flexion and extension of the spine. Press into your palms as you lift and lower your spine, working to keep your arms relatively straight (avoiding any excessive elbow bend!)
Many of us know the ‘spiderman and reach’ from our other programs. Simple Twist is a closer variation! From the low lunge position, release your arm closest to your front leg and twist up and open to a fully extended arm. Bring your shoulders to stack.
We have done this one before! From a lunge position, reach your arms up and overhead. Most of you will remember this as the most basic version of our Crescent Lunge we learned and practiced many times!
Unit 3: Advanced Yoga Flows
Unit 1 and 2 were primarily focused on the basics of yoga poses and basic flows. In unit 3, students should understand yoga and be ready to take on more challenging sequences. Additionally, unit 3 can add in more complicated things like muscle action drills (MADs). MADs are small drills that engage and activate big and small muscles.
Example Lesson:
We are now at the point students can comfortably follow along! Grab some space and get ready to go!
If you want to take a look at the flow format and different parts you can check out Coach Lulu’s lesson notes below!
Integration:
**Childs, table top, down dog, rag doll, standing
Sun A: 1x Slow, 1x Fast
**Mountain, side stretch R, mountain, side stretch L, mountain, forward fold, ½ lift. High plank, chaturanga, up dog, down dog
Sun B: 1x Slow, 1x Fast
**Mountain, chair plane, 1 leg mountain, standing figure 4 variation, [place lifted ankle across standing thigh. Bring hands to chest.], 1 leg mountain, crescent plane
**Crescent lunge, low lunge, standing L [New: lift back foot off the mat, engage your glute and hamstring to bring your heal to the ceiling. Straighten through your front leg, as much as feels comfortable. Ground down through both palms], low lunge, high plank, chaturanga, up dog down dog
Sun B+: 1x
**Chair, Chair plane, 1 leg mountain, standing figure 4 [begin to add slight bend in front knee. Press tailbone down towards your mat], 1 leg mountain, airplane pose, crescent lunge, low lunge, standing L, 3x leg lifts [tap lifted toes on your mat, inhale lift, exhale lower] low lunge, high plank, chaturanga, up dog, down dog
Balancing Flow: 1x
**Chair -> Eagle [R/L]
**Mountain -> Dancer [R/L]
**Mountain -> Tree [R/L]
Surrender Flow: 1x
**Seated forward fold
**Supta baddah konasana
**Supine cow face pose
Ready to Bring Yoga to Your School?
Schedule a 15-Minute demo to learn how PE teachers are ushering in a new age of Physical Education with Wellness, Fitness and Technology!

Key Takeaways on Yoga Lesson Plans For High School
Yoga lesson plans for high school students can be a fun addition to your PE curriculum. Schools across the country are adding yoga to physical education because of the myriad of benefits this exercise option brings.
As a PE teacher, you might know the basics of yoga but uncertain if you could lead a full workout. Grab from a full slate of PE yoga lesson plans from PLT4M and get the yoga flows rolling!
Yoga lesson plan FAQs
How is each yoga unit delivered?
PLT4M is a digital tool that allows you to deliver workouts through any device. Students can access lessons right from their phone or computer, or you can project the classes up on a TV or screen.
Aside from yoga PE activities, what else do you cover?
PLT4M has a whole slate of instructional content for you to choose from! Grab from our library of pe lesson plans that includes fitness, weightlifting, mindfulness, nutrition, pilates, dance fitness, and more.
Our ever-growing library of original content includes a variety of programs intended to spark lifelong physical literacy. Check out the options below:
- Fitness
- Weight Training
- Dance Fitness
- Mindfulness
- Yoga
- Pilates
- Boxing
- Bootcamp
- Remote Learning
- Swim
- Spin
- Tread
- Gymnastics
- Kan Jam
- Pickleball
- Badminton
- Personal Hygiene
- Drug and Substance Education
- Nutrition
- Sleep
- Physical Literacy
- Social Emotional Learning
- Health Education Lesson Plans
Do you only provide a yoga lesson plan template for high school students?
We also provide lessons for middle school students! We have even started creating content that many elementary school students could use.
