Warrior yoga poses are layered into many popular yoga practices. Therefore, we want to practice and develop form and technique with yoga warrior poses to set ourselves up for success. We explore form, technique, and modifications for yoga warrior poses. Give these movements a try for yourself or with your students!
Types Of Yoga Warrior Poses
Within the expansive list of yoga poses, there are a variety of different warrior variations. Different types of yoga warrior poses include:
Warrior I
Warrior II
Warrior III
Reverse Warrior
Fierce Warrior
Humble Warrior
All of these yoga warrior poses can be found in our yoga classes and practice. Therefore, we encourage introducing some of the basic yoga warrior poses in beginner-level yoga lesson plans.
Introducing 4 Yoga Warrior Poses
While we can eventually learn all of the yoga warrior poses, at PLT4M, we start by introducing the following:
Warrior II
Reverse Warrior
Warrior I
Warrior III
You might have noticed that warrior 1, 2, and 3 are “out of order.” At PLT4M, we do this intentionally to gradually introduce students to easier variations before moving to the more complex versions of the yoga warrior poses.
In addition, rather than jumping into yoga flows, we start by finding and breaking down the individual poses on each side.
For example, in our warrior II, we start with our right foot forward left foot back. From here, we extend our right arm forward and left arm back. After practicing this side of our warrior II, we repeat it with our left leg, left arm forward, and right leg, right arm back.
After practicing the warrior poses and other yoga poses individually, we can build them into our regular practice and yoga flows, leading to a more enjoyable experience.
As an added bonus, these videos are from our Flow On The Go series. These are great additions for physical education, but can also be a part of a movement or brain break activity in any class!
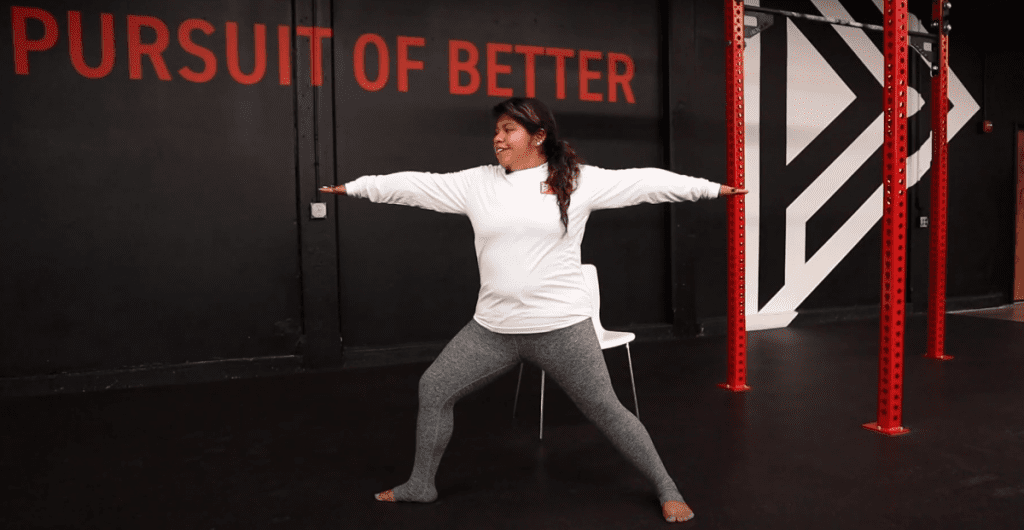
Warrior II
To start out yoga warrior poses introduction, we want to first get comfortable with our yoga stance.
1. Separate your feet and point your front foot forward and back foot out to the side.
2. From here, check to see that your front heel is bisecting your back foot arch.
3. Place a 90 degree bend in your front knee and make sure to keep your knee stacked over your ankle.
4. Press your tailbone down to keep your shoulders stacked over your hips.
This is your stance! Start with your feet closer together, and as you feel more comfortable in this stance, you can widen your feet out on your mat to increase the difficulty. Our primary goal is to keep the 90-degree angle in our front leg, so only widen your stance as far as you can continue this performance point.
To complete the Warrior 2 pose, T out your arms and squeeze your shoulder blades together to create length through your fingertips. Option to keep your gaze straight ahead, or maybe bring it over your front fingertips.
3 Points of performance:
-(Front) heel to (Back) arch alignment
-90 degree bend in your knee and stack it over your ankle
-Reach your arms in opposite directions, and squeeze your shoulder blades together
Reverse Warrior
Within our yoga warrior poses, our next variation is the reverse warrior. To get to our reverse warrior, we will go back to the standard warrior (arms T’d out to the side). From here take your front arm and reach it up and overhead. Let your back arm softly rest on your right thigh (or option to fold it behind your back).
Lengthen your arm overhead and reach your fingertips back to open up. Feel your obliques and side stretching out! Our goal is to stay stacked here, and not excessively lean forward or backward. Think about keeping everything in your upper body in a straight line.
3 points of performance:
– Front knee bent at 90 degrees
-Reach your top fingertips up to lengthen your side body, and then back to open
-Little to no weight in your back hand
Warrior I
Facing the top of your mat, keep your feet hip width apart and step one foot backward.
Point your back foot at a 45 degree angle towards the top corner of your mat. Work to press your entire heel down so that your entire foot is in contact with the ground. Your front leg should still be bent 90 degrees like our other yoga warrior poses.
From here, it may feel comfortable to twist a little and open up, but we want to square our hips and remain facing forward. You can use your hands to actually turn your body so that it stays square.
Lastly with our arms, we can either keep our hands at heart center or raise them up over our heads.
A common fault students might find is they have a tailbone pointing out and excessively leaning forward. With this pose we want to be sure our shoulders are stacked over our hips. A fun tip to remember is to ‘scoop’ your tailbone up and allow your core and chest to keep you at a tall, firm position.
Warrior III
Warrior III is the hardest of our 4 yoga warrior poses in this series. Our Warrior III Pose is very similar to Airplane but with a slight twist with our arms, making it a little bit harder! Instead of reaching our arms out behind us, now we will extend them out in front of us.
This will be more difficult for many of us as it will disperse our weight and rely on our core and legs to stabilize us even more!
To find Warrior 3, we will start at Crescent Lunge again, extend our back leg, and maintain the bend in the front while hinging. Option to keep your arms and hands at heart center if you feel too shaky with your arms out in front of you.
With your arms out in front, you may feel as if you are rounding your back and dropping your chest towards your front knee. Squeeze your core! Engage your core and look to draw your shoulders up, keeping an excellent tight position!
Key Takeaways on Yoga Warrior Poses
With any yoga practice, it is important to find the right fit and modification for success. If we start with complicated yoga flows, we will leave students feeling frustrated and thinking yoga is not the right type of exercise for them.
But, if we take our yoga warrior poses and break them down piece by piece, we can support students confidence in comfort in the world of yoga. As a result, more students will feel and see the benefits of this excellent form of exercise.