Freestyle is one of the foundational strokes of swimming. And while we know everyone is eager to jump in the open water and swim freestyle, spending time working through freestyle drills can improve stroke technique, form, and efficiency.
Below are a wide range of drills and skills to practice for freestyle swimming. These freestyle swim drills are intended to help beginner level swimmers get comfortable and confident in the water.
Freestyle Drills Overview
We want to start by building a strong foundation with our flutter kick and bilateral breathing. Spend ample time ensuring that beginner swimmers develop good form and technique on both foundational aspects of the freestyle. From here, you can begin to add in different arm drills with and without the kickboard.
These freestyle drills are outlined in a scope and sequence that will allow swimmers to progress to successful regular freestyle swimming:
Part 1: Developing a strong flutter kick
Part 2: Drills with a kickboard
Part 3: Drills without a kickboard
These 13 drills culminate with students swimming freestyle, one the 4 strokes of swimming. However, we strongly recommend revisiting different drills over a series of swim lessons. It will take time for swimmers to develop the different elements of swimming freestyle. You can always return to different drills and mix and match drills to keep things fresh and exciting for students.
How To Utilize Freestyle Drills
First and foremost, we are not looking to create olympic swimmers with these freestyle drills. Our goal is to develop the basic skills so that swimming can be a lifelong fitness skill for students. As such, all of these materials focus on the BASICS of our four strokes and put together different elements to eventually lead to successful swimming.
Next, water safety must be our top priority. We want to ensure that swimmers stay safe throughout an entire workout. If you have a full 25-yard pool, determine if swimmers can travel the full distance or need to scale and cut down the distance in half (12.5 yards). Depending on the pool set up, beginner swimmers should either be able to stand (shallow end) or grab onto a wall at any point as they practice these swim skills.
Regardless of the distance swimmers will travel, we recommend practicing the different drills for multiple reps in a workout. These materials do follow a suggested sequential order to start. Meaning, we start with the basics and build up to more complicated freestyle drills over time. However, swimmers can and should repeat drills over multiple lessons to really master the basics of the different strokes. Swimming is about repetition and getting comfortable and confident in the water.
Kickboards are a must! We want to ensure that students can practice swimming with the support of a kickboard or similar device (noodle, buoy, etc). This will allow students to stay at the surface of the water for introductory drills and really start to get comfortable. Overtime, we can remove the kickboard when appropriate and continue practicing the drills. Again, we can always return to the kickboard or other device at any point if fatigue sets in, or we start to struggle with form or technique.
Part 1: Kick Focus Freestyle Drills
Flutter Kick - Dryland
The flutter kick is the foundation of our freestyle stroke. In this freestyle drill, we start outside of the water to master the basics of flutter kick before adding the resistance of the water. The steps to the flutter kick are:
1) Lay flat on your back and place your hands by your side (more challenging) or under your butt (less challenging).
2) Straighten your legs and point your toes away from you
3) Kick your legs up and down using your hips and big muscles (hamstrings, quads, and glutes)
4) Work to keep kicks small and fast.
Common Faults:
Bent Knees – Especially when we get into the water, we often see swimmers bend knees and perform a bicycle kick. A helpful trick is working to squeeze your butt and point your toes.
Boot Feet – Pointed toes can be challenging, especially for swimmers with limited mobility. We can develop this skill in the water overtime, but also can help by stretching calves and achilles out of the water.
Flutter Kick On Wall
To start, we will focus on just performing our flutter kick from the wall. Practicing on the wall can help us learn how to control our body before we set out to actual swimming.
1) Grab onto the wall and reach your arms out to full extension
2) Start with your head down in a neutral position, looking at the bottom of the pool.
3) Point your toes and kick your legs in a small and fast motion up and down. Think about kicking through your hips, quads, glutes, and hamstrings – not from your knees. We want to avoid bicycle kicking.
4) Blow bubbles out underneath the water and pick your head up to breath. Right now we are NOT trying to breath side to side (bi-lateral breathing).
Our goal here is to have our body in a straight line and at the top of the water. Once we leave the wall we will want to avoid our body sinking or sagging. This is a great drill to feel awesome body position and staying at the top of the water surface.
Common Faults:
Bent Knees – Especially when we get into the water, we often see swimmers bend knees and perform a bicycle kick. A helpful trick is working to squeeze your butt and point your toes.
Boot Feet – Pointed toes can be challenging, especially for swimmers with limited mobility. We can develop this skill in the water overtime, but also can help by stretching calves and achilles out of the water.
Bent Arms: We want two extended arms! Full arm extension will be challenging in the water. But we want to work on a full PRESS forward so that our arms are fully extended and we stay at the top of the water surface.
Flutter Kick On Wall With Bilateral Breathing
Once you feel confident with the flutter kick, it is time to add in bilateral breathing. Bilateral breathing means breathing side to side instead of picking your head up out of the water. This is one of the toughest things new swimmers struggle with, but is incredibly important to set a strong foundation. We will spend more time on this in future freestyle drills!
Keep all the same points of performance for flutter kick, but now work to breath to your side:
1) Start with your head down in a neutral position, looking at the bottom of the pool.
2) When you need to breath turn your head sideways leaving one ear in the water and other up and out facing the sky.
3) Breath in through your mouth and then rotate back to neutral position.
4) Rotate your breathing to both sides.
5) If mobility is an issue, it is okay to let go off the wall with the arm you are breathing towards. For example: Drop left arm, roll to left side, breath, and then return arm to wall as you put head back down into water facing neutral position.
Common Faults:
Looking Up: Many beginner swimmers will pick their head up because it feels more natural. Always work to roll your body sideways, and avoid looking up. Think neutral gaze down or sideways. We really shouldn’t be looking up or picking our heads up when freestyle swimming.
Drinking Water: When we go to breath to our side, it can be hard to create a window to get a good breath of air. Beginners will get comfortable by rotating a little farther on their sides to get a full breath.
Flutter Kick and Bilateral Breathing With Kickboard
After practicing and developing our kick series on the wall, we are going to take it into the open water of the pool. All of the same principles apply, but now we are going to use a kickboard instead of the wall. Let’s quickly review how to hold the kickboard. Grip the kickboard with your hands either on the sides or top at the END of the kickboard. We want to avoid laying our entire arm on the kickboard so that we can begin to use our arms in future freestyle drills. From here, we will push off the wall and work to perform all the same components of our flutter kick and bilateral breathing. Now that we have left the wall, it will be up to your strong kicking to keep your body at the top of the water. Work to keep your arms full extended throughout this drill. Common Faults:
Looking Up: Many beginner swimmers will pick their head up because it feels more natural. Always work to roll your body sideways, and avoid looking up. Think neutral gaze down or sideways. We really shouldn’t be looking up or picking our heads up when freestyle swimming. Drinking Water: When we go to breath to our side, it can be hard to create a window to get a good breath of air. Beginners will get comfortable by rotating a little farther on their sides to get a full breath. Bent Arms: Once we start moving off the wall, the kickboard will be less supportive. Swimmers naturally often bring the board closer to their body with bent elbows. While this is an instinctive reaction, it actually makes staying at the top of the water harder. Keep a strong press with the board! |
Part 2: Kickboard Drills With Arms
Single Arm Freestyle Stroke With Kickboard
Time to add in the arms! Next, we will do a single arm swimming drill with our kickboard.
1) Start by pushing off the wall and kicking to get yourself into your swimming position.
2) Release one hand from the kickboard so that your hand is just outside the frame of the kickboard.
3) With an open hand, pull down and to your side body in a sweeping motion
4) Pull your hand and arm out of the water at the back of your stroke and return it to the kickboard
5) Repeat with your right arm for entire length, before repeating with your left arm.
6) Focus on keeping your non-pulling arm fully extended for the entire length.
7) When you need to breath, breath towards the arm that you are using to pull.
In this drill, we want to focus on keeping our arm from crossing over the imaginary line in the middle of our body. Work to pull down and towards your hip, not toward your stomach.
Common Faults:
Dropping Shoulders: When performing the pull, swimmers often drop their shoulders and just let gravity do the work during the arm stroke. Keep a high shoulder and upperarm, driving most of our pull from elbow, wrist, and hand. This will be more efficient and better for our shoulders.
Fast Arms: In all our freestyle drills, we want to slow down and get our mechanics right. It can be tempting to fly through these drills and take lots of strokes per length. Slow down and get the motion right!
Bent Elbows: The arm holding the kickboard has the tendency to bend. Keep your “lead arm” straight with a strong press. You should feel like you have a string pulling your hand out in front of you.
Catch Up Drill With Kick Board
Next we will add both arms into the equation. This type of swimming mirrors regular freestyle but with the support of a kicboard.
1) Start with a push from the wall and kicking to your strong swimming position.
2) Now, we will alternate arms. Always return both hands to the kickboard before starting your next pull.
3) Work to take multiple strokes before breathing. When you breath, continue to breath towards the side you are pulling, using the window you have created with your released arm.
Common Fault:
Dropping Shoulders: When performing the pull, swimmers often drop their shoulders and just let gravity do the work. Keep a high shoulder and upperarm, driving most of our pull from elbow, wrist, and hand. This will be more efficient and better for our shoulders.
Fast Arms: In all our freestyle drills, we want to slow down and get our mechanics right. It can be tempting to fly through these drills and take lots of strokes per length. Slow down and get the motion right!
Bent Elbows: The arm holding the kickboard has the tendency to bend. Keep your “lead arm” straight with a strong press. You should feel like you have a string pulling your hand out in front of you.
Zipper Drill Freestyle With Kick Board
A big piece of swimming is having a bent elbow in the back of your stroke. You will often hear this referred to as your high elbow recovery. We want to avoid windmilling our arms in big circles over the top. This is both inefficient and can lead to injury. To help us feel the bent elbow in the back of our stroke, we will practice the zipper drill.
1) Release your hand from kickboard and perform a regular stroke
2) Trace your thumb from your waist up to your armpit creating a bent elbow.
3) Once your thumb hits your armpit, reach your hand back out in front of you and return it to the kicboard.
4) Alternate arms, always zipping up your side body before returning hand to board.
Common Faults:
Pretend Zipper: While this is a pretend zipper, don’t pretend to drag your thumb up your body. Swimmers need to make physical contact with thumb to side body. This will help really get the arm positioning down. Get an actual finger drag along the side of your body!
Mobility: Getting the thumb all the way to armpit can be challenging. Swimmers can modify and stop a little lower on mid section. But the goal is to get elbow as high as possible.
Finger Tip Drag With Kick Board
Another important component of swimming is being in control throughout our entire arm motion. We often can feel like we are throwing or flailing our arms when swimming freestyle. To help us keep our arms controlled, we will practice the fingertip drag drill.
1) Release your hand from the kickboard and perform a regular stroke.
2) From the back of your stroke, return your arm to the kickboard by dragging your fingertips on the top of the water.
3) Keep your elbow high in the back and keep your arm extension one fluid motion (don’t throw or speed up your stroke)
Common Faults:
Control: Controlling arms just above the water and dragging can be very difficult! It is okay to modify and drag more or less of the hand along the water surface.
Mobility: Finger Tip Drag should start close to armpit just like zipper drill. This is tough for those with limited mobility and can be modified by starting finger tip drag further away from body to start.
Zipper & Finger Tip Drag Freestyle Combo With Kick Board
Next we will combine our zipper and finger tip drill together. The goal of this combination is to practice and feel the full fluid motion of your arm stroke. Notice how these two drills keep your arms on the imaginary “train tracks” of our body frame.
1) Release hand and pull down towards your hip.
2) Trace thumb along side of the body from hip to armpit.
3) Drag fingers along top of water as you return hand to kickboard.
4) Alternate strokes.
Common Faults:
Sinking: This drill requires us to keep a steady kick. We are really slowing down our freestyle arms so we want to make sure our kick keeps us up at the top of the water throughout the entire process.
Control: Controlling arms just above the water and dragging can be very difficult! It is okay to modify and drag more or less of the hand along the water surface.
Mobility: Finger Tip Drag should start close to armpit just like zipper drill. This is tough for those with limited mobility and can be modified by starting finger tip drag further away from body to start.
Freestyle Drills Without Kickboard
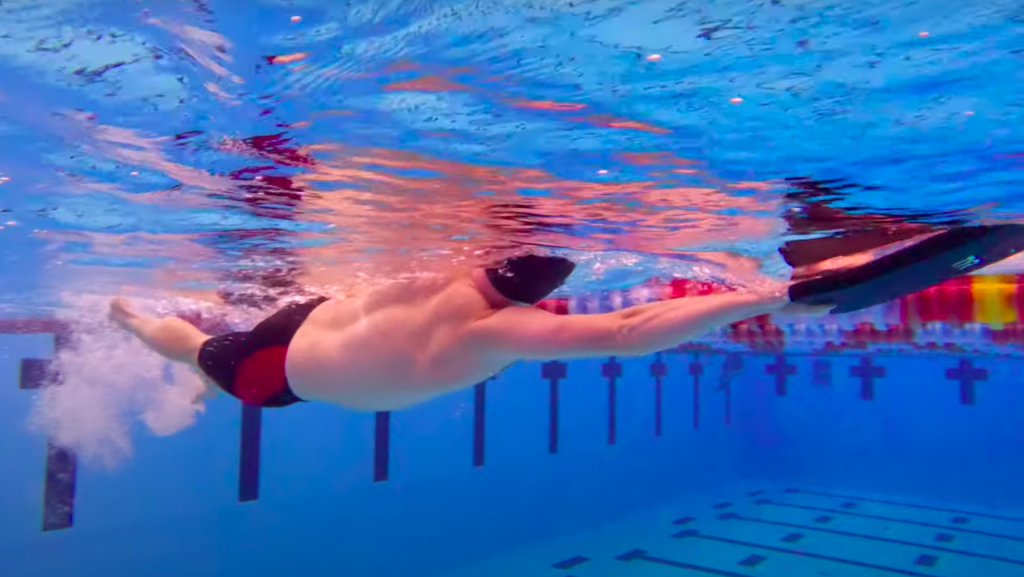
Streamline
Now that we have done a lot of practice with our kickboard, we are going to work towards regular freestyle swimming without a board. Before we get into swimming, let’s practice our streamline. Every time you push off the wall without a kickboard, you should start with a streamline.
1) Extend arms above your head and place hands on top of each other like pancakes.
2) Squeeze your arms over your ears turning your body into an arrow
3) Push from the wall in this position and kick before starting any strokes
Common Faults:
Looking Up: Our streamline requires a neutral gaze. Many swimmers “look up” and break the nice streamline position. Work to look down at bottom of the pool and break out of streamline once you feel yourself at the top of the water.
Arms and Head Disconnected: Our streamline should be tight! Often swimmers have bent elbows and don’t squeeze their arms to head. We want a tight squeeze to create a straight line with body.
Catch Up Drill Freestyle
Next, we will repeat the freestyle drills we already learned but WITHOUT a kickboard. If at any point you are struggling to keep your body at the top of the water or maintain good form, always feel free to add the kickboard back in as an added support.
Important Note: The kickboard was helping you keep your body at the top of the water! Now your kick is even more important because it will help you stay afloat.
Our catch up drill is exactly the same, but now we use our hands instead of the kickboard:
1) Start in a streamline position and kick off the wall.
2) Release one hand from streamline and perform a freestyle stroke.
3) Return your hand to streamline position by tapping your opposite hand before starting your next stroke.
4) Work on fully extending your arms out in front of you.
Common Faults:
Half Catch Up: Many swimmers think we are joking when we say they should slap or tap the hand before starting the next stroke. We aren’t! Return to streamline and “catch up” to your next hand.
Bent Elbows: Swimmers struggle to get arms fully extended above head. While it might feel easier to have a bend in the elbow, it is inefficient and can lead people to sink sag in the water. Much like with our kickboard, think about a strong press!
Zipper Drill Freestyle
Next we will return to the zipper drill without the kickboard. We can continue to return to streamline aka catch up drill if that helps! If we are ready, we can start to work towards a more natural freestyle position at the front where our arms don’t return to streamline, but rather are extended directly out in front of us. Think arms stacked over shoulders in a straight line.
1) Trace your thumb from your waist up to your armpit creating a bent elbow.
2) Once your thumb hits your armpit, reach your hand back out in front of you and return it to the streamline position.
3) Alternate arms, always zipping up your side body before returning hand to streamline.
Common Faults:
Pretend Zipper: While this is a pretend zipper, don’t pretend to drag your thumb up your body. Swimmers need to make physical contact with thumb to side body. This will help really get the arm positioning down.
Mobility: Getting the thumb all the way to armpit can be challenging. Swimmers can modify and stop a little lower on mid section. But the goal is to get elbow as high as possible.
Finger Tip Drag
Next we will return to the finger tip drag drill without the kickboard. We can continue to return to streamline aka catch up drill if that helps! If we are ready, we can start to work towards a more natural freestyle position at the front where our arms don’t return to streamline, but rather are extended directly out in front of us. Think arms stacked over shoulders in a straight line.
1) Release your hand from streamline and take a regular pull.
2) From the back of your stroke, return your arm to streamline by dragging your fingertips along the top of the water.
3) Keep your elbow high in the back and keep your arm extension one fluid motion (don’t throw or speed up your stroke)
Common Faults:
Control: Controlling arms just above the water and dragging can be very difficult! It is okay to modify and drag more or less of the hand along the water surface.
Mobility: Finger Tip Drag should start close to armpit just like zipper drill. This is tough for those with limited mobility and can be modified by starting finger tip drag further away from body to start.
Key Takeaways on Freestyle – Putting It All Together
Now that we have worked on a wide range of drills with and without our kickboard, it is time to try regular freestyle. Throughout our drills, we focused on strong kick, high elbows in the back, extended arms at the front, and clean technique and arm rotation.
Few basics we want to keep in mind once we start to put it all together!
- Kick: Straight legs and pointed toes.
- Arms In Front: Fully extended elbow. Hand and arm stacked over shoulder.
- Pull: Pull down and bring elbow up and out of water before returning to front.
- Streamline: Start each new length of freestyle with a strong push and streamline off the wall.
- Head & Breath: Keep head in neutral position looking down. When you need to breath, keep one ear in the water and turn towards the side.
If any point in our regular freestyle, we are struggling with any components of our the freestyle, it is okay to go back and rework our different drills with and without a kickboard. Even gold medal swimmers go back to the basics all the time! Don’t be afraid to revisit drills at any time!