The Deadlift, MB Lunges, Core, & Conditioning
*Required Equipment*- Med Balls
- Room for running (loop or shuttles), or equipment for stationary cardio (bike/elliptical/etc)
Goals:
- Review the concept of “supersets” and Strengthen the Core
- Review the “Hinge” & Introduce the Deadlift
- Review the “Lunge” & Introduce a Loaded Variation
- Practice Movement Patterns & Develop Work Capacity
Teacher’s Preview to Class:
The first thing we’ll be doing is working through a quick core “super-set”, comprised of glute bridges and planks. Remember, this means you will complete a set of the first movement, then proceed to the second with minimal rest. After the second, you rest for the allotted minute, then begin the superset again. Both of these movements will shore up our core and prepare us for the movements to follow! Next, we introduce one of the most important and mis-performed concepts in all of fitness – the deadlift. Today, we will be learning this “Hinge” movement with the use of a med ball. It may seem easy or light to some of you, but it is imperative that you master the technique. We will be progressing into much heavier versions of this lift in the future, and it is the riskiest of all movements to perform poorly under load. After the “Deads”, we review our basic lunge and introduce the loaded variation – a med ball “front rack” lunge. We will be holding it much like we did with our squats, but perform alternating lunges in place instead. Lastly, our workout today is heavy on the conditioning. Find a great pace and work that aerobic capacity!Dynamic Warm Up:
Begin everyone with 2 straight minutes of Light Cardio – an easy jog, time of a stationary bike, etc, your choice. Then move together into the couplet below:Mobility:
Then, gather everyone together, review each movement with video & explanation then hold together for allotted time. Focus on easing into a good position and breathing into the stretch rather than fighting more intense discomfort.- Modified Pigeon Pose – 1 minute, each leg
- Coaching Point: An example of joint distraction vs “stretching”.A modification of our normal pigeon pose, this stretch is an excellent way to create space in the hip joint. This will make it easier to move through ranges of motion like the ones used in a lunge or deadlift.
- Couch Pose – 1 minute, each leg
- Coaching Point: “Hip Flexor” is a term thrown around quite a bit due to it being a common problem area for many athletes and trainees. There are actually 9 different muscles that make up the “hip flexors” – aka those responsible for bringing your knee up towards your chest. When you sit, these muscles are in a “flexed” or shortened position. Most people spend a vast majority of their day in some sort of a seated position. Think about how much time your hip flexors are forced into a shortened position – A LOT. Over time, this causes them to become tighter and tighter. This can lead to chronic posture problems (think of the elderly gentlemen who must walk hunched over) or potential injury (surrounding musculature will always attempt to compensate for immobile areas, leading to overreaching and injury). Here is an easy way to get a great stretch of the anterior ankle, shins, quadriceps, and hip flexors all at once.
Core:
Review concept of superset and demo each movement with points of performance. Then set students to it with a 6 minute clock.- Single Leg Glute Bridge – 3 x :15 seconds each
- Coaching Point: Be sure drive foot into the ground, and keep your shoulder blades (and only shoulder blades!) in contact with the floor throughout the movement. Squeeze the glutes and hold full hip extension for the duration of the movement.
- Push-up Plank – 3 x :30 seconds
- Coaching Point: From the top of a normal push up position, press the palms into the floor, actively engaging their shoulders. As with our elbow plank, the entire core should be engaged. Think about sucking your belly button through your spine, and squeezing the glutes and quads together. The entire body should be in an active hold for the duration of the movement, do not let the hips sag or the shoulder joints loosen.
Movement Instruction:
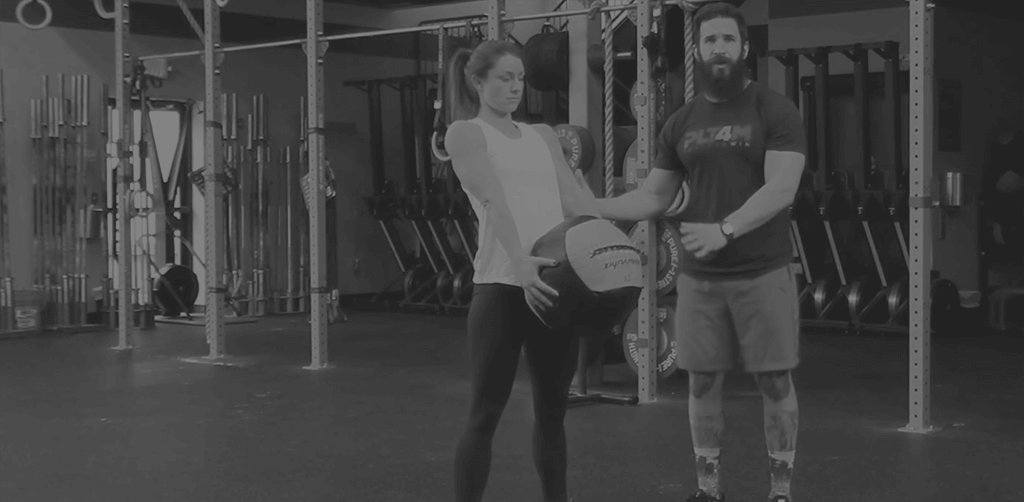
Next ask students to each grab a LIGHT med ball. Watch each video with the class, demo the movement yourself or with a volunteer, then have students spend 2 minutes working through 3 sets of 5 warm up reps on their own. Instruct them to focus on points of performance at ALL TIMES. We want great movement above all.Introduction & Points of Performance:
The “King” of strength exercises, the deadlift is a super important piece in any training program. Whether you’ll go on to train for athletics, or are just looking to be the best, most healthy version of yourself, it is imperative that you learn how to deadlift properly.You do it every time you pick your backpack up, or lift something from the ground. We must do it safely and efficiently. With the MB Deadlift, we are looking for 4 main points of performance:
1. Stance – athletes begin standing tall over the med ball. Back of the ball should be at the athlete’s midline. Feet should be just outside of the ball on each side.
2. Set Up – Athlete will drop the hips slight and hinge forward (remember the good morning??) until they can reach the ball. The athlete’s palms should be firmly on the sides of the med ball while the arms stay long and loose. Hips should be higher than the knees, and shoulders higher than the hips. This ensures proper alignment of the spine and maintenance of the lumbar curve (flat backs!).
3. The “Push” – though the deadlift often referred to as a “pull”, it is easier to teach your athletes to “push the floor away”. Hips and shoulders rise together (keep that back flat), until the hip must open by reversing the hinge to complete the movement and achieve full extension (standing tall).
4. The “Return” – the ball should return to the floor in exactly the same manner is was lifted. Hinge first, then a drop of the hips while maintaining that lumbar curve. Remember, during every rep the arms should stay long, and the feet should remain in complete contact with the ground. Above all, we must maintain proper back alignment!
Introduction & Points of Performance:
We’re introducing just a small wrinkle to our lunge movement today by adding the Med Ball. First, review the points of performance of a lunge:1. The lead, or “lunge” leg, should be stepped forward only so far as creates a perfect 90 degree angle of the knee in the bottom position. Your lower leg should be straight up and down, with the knee stacked directly over the ankle. If you overreach that front leg, you will throw the rest of your body’s positioning off.
1. Maintain a neutral spine and vertical torso. Don’t lean the chest out over the lead leg, and don’t arch the back excessively while trying to reach too far with the front leg. Engage your midline and keep the upper body in a static position over your hips throughout the rep.
2. Back leg should also create a right angle with the ground. This time, it is your thigh that should be straight up and down. The knee does not need to make actual, strong physical contact with the floor, especially if the surface is hard. Just get close.
3. Always remain within the framework of your shoulders. There is no need to “be on ski’s” with a super narrow stance that is tough to balance. The lead leg may kick out from your midline to something of a shoulder width trajectory – but no more.
4. Now, let’s move on to our weighted version. We are very simply adding a weighted instrument, namely a light med ball, to our previous alternating lunge movement. Athletes will hold the (preferably soft) med ball up against the chest, under the chin – just like we do for our squats.
As with any lunge, keep the knee of the front leg in line with the ankle, creating that solid 90 degree angle. Let the back knee brush the ground, and always come to full hip extension at the top of each rep.
Finisher:
800m Run Then, 3 Rounds of: 30 Alt. FR Lunges (20lb ball max) 15 Deadlifts (20lb ball max) Then, 800m Run
